
How to Get a Perfect Bantu-Knot Out EVERY TIME
- Azé
- Aug 14, 2025
- 3 min read

Hey beauties! It is summertime and sometimes you just want your natural hair to breathe. Bantu-knots are one of my favorite styles to wear in any season, but especially during the summer! Here’s how I install them to promote maximum healthy hair growth and length retention. Watch the YouTube video here:
I start by sectioning my hair. I already had cornrows in from another style, so the front half of my hair was already sectioned off and styled. With just the back half left, I split it into four large sections.
Starting with the first of the four sections, I split that into three smaller parts so I can have 3 Bantu knots per section. Depending on how large my section is, I add or take away a Bantu knot so my curls can be as even as possible. I said earlier I split my hair into four large sections, so with me doing 3 Bantu knots per section I’ll have about 12 Bantu knots in total.
With one of the small parts in my hand, I detangle it with aloe and warm water. Here you can choose to sub in your favorite detangling product, like conditioner with a lot of slip or flaxseed gel, whatever floats your boat.
With my hair detangled and damp, I — now I need my lovelies to brace yourselves because this is not like me, but ya girl had to do what ya girl had to do. Someone gifted me a bottle of lotta body foam after their trip to the U.S. and you know there’s not a lot of options down here for our hair. Plus, we had a show to do and I wanted my curls POPPIN. So I applied the foam to each of my damp + detangled parts, combing it through with my fingers, from root to tip.
I know I used enough foam when it felt like my part was really saturated with the product; after I finished installing these Bantu knots the bottle was half-gone chile.
Once I felt like the product was all up and through the section, I braid my root, then do a two-strand twist all the way down. I braid my root 1- 1 1/2 inches down, then two-strand twist all the way to my ends.
Once complete, I then Bantu knot in the direction of my two-strand twist. Pro-tip: If your two-strand twist is unraveling as you put your section in a Bantu knot, you’re twisting in the WRONG DIRECTION. Your two-strand should remain intact as you install the Bantu knot.
Bantu-knotting tips:
YOUR SCALP SHOULD NOT FEEL INFLAMED and in pain when you’re wrapping your Bantu knot. In fact, it shouldn’t feel tight at your scalp at all! If it does, you’re literally balding yourself and/or putting yourself at risk of ripping your hair out at the root…which means balding yourself.
Instead, just be mindful when youre twisting your knots! Think of just wrapping the hair around itself, don’t think of making it as tight as possible. Tightness does not equal curliness or effectiveness.
TUCK THOSE ENDS. I can’t stand undefined ends in a Bantu-knot out, braid-out, twist-out or any other kind of out! At the end of your Bantu-knot make sure you wrap until the ends are all the way tucked in!
IF YOUR SECTION IS TOO THICK, split it into two section! Consistency is the key to a perfect Bantu-knot. You don’t want one part of your hair with looser curls than the other side because you got lazy and started doing bigger parts!
The bigger the parts the looser the curls when it comes to a Bantu-knot out. So pick a size and stick to it! If it’s too thick, just split it up. If it’s too skinny, no worries, you can get away with it!
BONUS!
With all this in mind, you’re going to repeat these steps and install the rest of your Bantu knots!
Given that my hair is dense, it took a few days for it to dry completely, plus I didn’t want to take them out until the day of the show anyway.
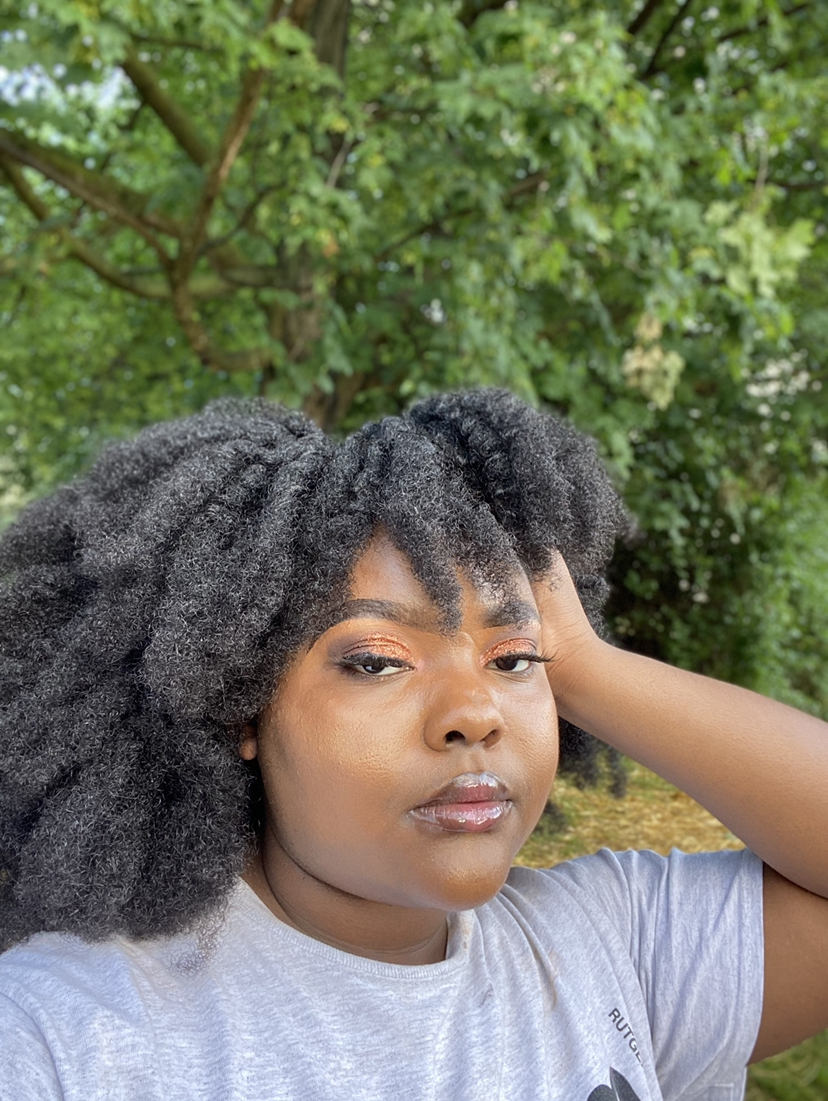
So I ended up rocking my cornrows and bantu-knots for about a week before taking them out. And these curls are the results!


I hope you enjoyed this lovelies! If you did leave a pink heart 💖 and I’ll see you in the next one 🙌🏾


Comments